Tag / Scrapbooking
Scrapbooking for Beginners Part 1
Good morning friends! I started this blog with a very generalized idea of community. People getting together to talk about scrapbooking, memory keeping and crafting.
I know that sometimes I cover a wide variety of topics so I thought maybe it was time to go back to the basics for a little while.
I am going to try to alternate my Sketch Saturday Card posts with some very specific posts aimed at those who want to start scrapbooking in some fashion but don’t know where to start.
So to that end, welcome to – Scrapbooking for Beginners Part 1.
Introduction:
Scrapbooking, memory keeping, telling your story – no matter how you phrase it, the thought of getting started can be a little overwhelming.
Let’s start with a few questions:
- Do you love pictures?
- Does looking at a photo immediately take you back to that time or place?
- Do you have family stories that everyone brings up when you are all together?
- Would you like to have an album of printed pictures on hand for you and your family to look through & enjoy?
- Do you want to make sure you and/or your children have basic information about who the people in those pictures are?
If you answered yes to any of the above, maybe you would enjoy some type of Scrapbooking or Memory Keeping.
Scrapbooking Your Way:
For some people, the term scrapbooking sounds old fashioned. It brings to mind cutting your pictures into odd shapes & gluing them onto cardstock with a few stickers thrown around the page.
Possibly you have been to a crop where you were told to only use a certain type or brand of product.
Maybe you have looked at Pinterest and seen pages with 1 tiny photo surrounded by a ton of stuff, but you have so many pictures you want to use.
Well, let me tell you – there is no wrong way to keep your memories.
Memory keeping is about getting your photos off your phone or camera and being able to share them with your friends & family. How you share & enjoy them is entirely up to you.
Starting with Supplies:
As with any hobby, there are some basic supplies that you will need to start with. However, I need to caution you to ONLY think about the bare minimum at this point.
Sometimes it is better to have fewer choices to make, especially in the beginning.
Stay with me over the next few weeks and let’s take this one step at a time.
At the most basic level you will need some photos, patterned paper and/or cardstock, adhesive and a pen.
Scissors and/or a paper trimmer would be helpful and you will want some type of stickers or embellishments to dress everything up.
At this point you don’t necessarily need an album but it would help if you had an idea of the size and style you want to work with when making your first layout.
Below are two handouts to help you with this step.
The first is called The Bare Necessities & it lists some of your options for each basic supply category.
Keep this handy when you are either in a store or looking online as there are multiple brands, types & styles of supplies. Keep it simple & basic for the first time around.
(Shameless plug inserted here: I do believe that Creative Memories has some of the best tools & albums in the scrapbooking industry. I have been using them for over 20+ years.
I am currently a CM Advisor if you would like to use my affiliate link. Please note that using this link is no extra charge for you but I will make a small commission on any products purchased.)
The second handout is about the albums. Again, there are many brands, types & styles. This will give you some information about the available options.
A lot of it is personal preference & remember – you can always change your mind later if you begin with one size or style & decide you don’t like it or it isn’t working for your current project.
A lot of people use different sizes/styles for different types of projects or sets of pictures.
Scrapbooking for Beginners Part 1 Handouts
Scrapbooking for Beginners Part 1 - Action Plan:
What I would like for you to do this week is to start with your photos.
We take SO many photos today, of really anything & everything. BUT, there are still going to be those special pictures of little moments, big events & loved ones that stand out above the rest.
These are the photos you want to save & cherish for years to come.
So the first step is to identify a few pictures (maybe 4 – 8) that are special to you & related in some way. It could be of the same time frame or the same person (or group of people) spread over the years. It could be a weekend trip or event like a graduation.
Choose pictures you are excited to work with right now and print them.
Again, we are starting simple, so don’t worry about photo sizes just print them all in a 4 x 6 format.
The second step is to pick an album size. If you want to buy an album or if you already have one that is great but not necessary as long as you know that size you want to use.
Refer to the handout above to see some of the options. You can also read my previous blog post about album sizes for additional information.
You may want to also give some thought to single or double page layouts. This just means, do you prefer to make one page at a time or two?
I personally always make a double page spread so that my pages facing each other in the album match & are of the same subject. The only exceptions are my title pages & end pages of my book.
If it does not bother you if the pages are different, then use whichever you prefer the look of.
The last step is to gather your basic supplies. Refer to the supply handout above for some additional information about options and my recommendations.
If you have already started a stash of goodies, use what you have on hand.
One tip for choosing paper is to coordinate either the theme of the pictures or some of the colors in the photos.
So if you have birthday pictures, choose bright happy colors or go all out & pick paper with confetti or balloons. It can be as simple & subtle or as themed as you prefer.
I go for a variety in my scrapbooking but I always start with the photos for the inspiration of my pages.
Conclusion:
We have reached the end of Scrapbooking for Beginners Part 1.
Although this probably seems like a LOT of information, I hope I have broken it down into manageable steps to consider and get you started.
In Scrapbooking for Beginners Part 2 we will be making our first layout, so make sure to check back in soon.
In addition to the handouts above, you can also download these resources about photo management:
If you would like to read the blog post on Organizing your Photos you can find that here.
If you have any questions or would like some additional help/information, please leave me a comment below or a message on the Contact page.
You can subscribe to the blog & receive my Story Starter handout. The form is in the sidebar on the right.
You can also join my VIP Facebook Group or follow me on my social media channels.
I appreciate everyone who stops by & I hope I inspire & encourage you to save, organize & enjoy your photos & family stories.
Check back in soon!
Machelle
Memory Mate Case
Hello again! I know I usually do not have two posts this close together, but there has been a lot going on lately.
Creative Memories launches new products every two weeks with specific promotions in between. This time they introduced a new spin on an old classic – the Rainbow Dots Memory Mate Case.
I don’t remember what the older version was called but I have three of them & they are at least 15 or 20 years old. They are still in great condition & I use them all the time.

Now, as you can see, mine are pretty plain compared to the colorful polka dots and “island waters” interior but I wanted to give you a few ideas for ways you could use these.
The two main differences for you to note besides the color, are that the new one has a side zippered pocket to store small items (multi-purpose tool) and the handle is not attached to the zipper.
The older version is just slightly (like 1/2 to 3/4 inch) longer than the new one & I think maybe 1/4 inch taller. It is a minimal amount.
They do both have a divider that you can turn either direction or take out altogether.
Now let’s look at just a few of the things you can use the Memory Mate Case for.
First let’s look at some other Creative Memories tools and essentials.
On the left you have the Creative Memories Custom Cutting Circles and Ovals with the three blades. Of course, there is plenty of room to add other shapes or extra blades.
On the right I have quite the assortment of basic tools I use all the time. There are several different types of adhesive (regular, mini, extra strength & repositionable) along with refills.
In the front I have some My Life Mini Buttons in support of the Alzheimer’s Association, a couple of Creative Memories binder clips, scissors, multi-purpose tool, glue pen, lifter stick & distressing tools.
Now let’s look at some items related to card making:
On the left there are several sizes & shapes of stamping blocks for clear cling stamps. There is still room for more, but remember that the cases are fabric so you don’t want to weigh them down too much.
On the right are different size ink pads and a date stamp. The large ink pads have 4 stacked together for a total of eight plus 4 of the Distress regular size ink pads and 4 mini ones.
On the left I have supplies I use to make keychains with acrylic blanks and tassels. I make them with initials in vinyl or etched using my Cricut machine.
And finally, I also crochet, so here is a Memory Mate Case with a couple of skeins of yarn, crochet hooks and needles. This one is super light & could easily be taken somewhere to work on while you were in a waiting room or riding in the car on a trip. (I forgot to put scissors in the picture, but there is still plenty of room in the front pocket to add them in.)
Keep in mind, these are just a few of the items you can use these for. I know some of the other Creative Memories Advisors use them for personal items, especially packing for trips.
They are so versatile you could use them for just about anything! I would love to know what you would use them for, so leave me a comment & let me know.
If you are interested in more organizing, check out this post about my Rolling Cart Organization.
For organizing pictures for a crop or specific projects you can read about how I handle Picture Overload.
I am constantly organizing and re-organizing my supplies and looking for great products that have several uses.
The Rainbow Dots Memory Mate Case fits the bill & it’s super cute, too!
I will be back with more crafty inspiration and encouragement to save, organize & enjoy your photos (and crafts, and hobbies).
Talk again soon,
Machelle
P.S. – If you are interested in any of the Creative Memories tools that have I have featured in the pictures above, you can ask me a question or send a message on the Contact Us page.
If you would like to shop for any of these products, I would appreciate you supporting my business by using the link directly to my Advisor Page.
Thank you!
Creative or Crafty?
I recently saw an ad on Facebook that asked the question “Do people call you creative or crafty?”


What's the difference?
That was my first thought – aren’t they the same thing? But really they are not.
To me, being creative means sitting down with a blank piece of paper, canvas, etc. and creating something new. Starting with just an idea in your head.
Being crafty, on the other hand, is being able to replicate some idea or item you have seen. That doesn’t mean you can’t change it up and make it your own, just that the idea or item was not original to you.
In fact, most of the paper crafts I make end up not looking like the original, but some aspect sparked the idea.
Is one better than the other?
Absolutely NOT! They are just different. I personally am not a creative person, but give me a few minutes on Pinterest & I can find a multitude of things I want to make.
As long as I have a visual guide or written instructions I can make pretty much anything. Sometimes just a picture will do, depending on the item.
Below are two examples of this – the first one is a pin for a crochet pattern. Obviously, I need the written instructions to make this headband. However, the second pin in just a picture of the “mood board” page I made for my Word of the Year 2023.
Sharing and encouragement
I love the internet for inspiration and appreciate all the people who share their talents and ideas, regardless of whether they are creative or crafty.
That is one of the reasons I love crafty hobbies – because of the community. Everyone is so open and giving of their time and skills. Teaching, sharing and encouraging others.
Time well spent
Spending time on your hobbies is an important form of self-care. It always relaxes me to sit down and make something pretty. It is a bonus if I get to do that with friends, either in person or through Zoom or Facebook groups.
It also gives me a sense of accomplishment, especially if I have learned something new.
Creative or Crafty?
Which do you consider yourself? Let me know in the comments and share something you have made.
I am in the process of adding a gallery of some of the things I have made for inspiration and encouragement. Be sure to check back soon for more.
Machelle
Scrapbooking Purpose Statement
Hello everyone & Happy (inter)National Scrapbook Day! I decided today would be the perfect time to post my most recent project – my Scrapbooking Purpose Statement extended story.
It is no secret that I am a huge fan of Stacy Julian. She doesn’t just show you how to make a scrapbook page or project, she teaches concepts that you can take and put your own style on.
Even in her photo management class, Photo Freedom, she encourages you to take the basic ideas and use what works for you.
I am also a part of her Live Your Story Membership and that is where I first heard her talk about a Scrapbooking Purpose Statement.
This, along with her EQ (Enough Quotient) was one of our challenges last month in the membership.
The basic idea of the Scrapbooking Purpose Statement is to condense into one sentence or paragraph what scrapbooking means to you.
The Enough Quotient as it relates to this topic is what is enough for you? That could mean in time spent per week, number of pages or projects done or even how much forward progress you are making.
It took me a while to wrap my head around ALL the things that scrapbooking means to me and why I continue to enjoy this hobby after over 20 years. Once I stopped trying to make the Scrapbooking Purpose Statement all fit into one sentence, I could see it would be better as a bullet-type list instead.
Here is my cover page:

It is basically just a list of all the reasons why I scrapbook – to Remember, Celebrate, Document, Enjoy & Create.
But then I had to explain what those meant to me, specifically the people, places, events, big & little moments that we scrapbook. So I added another of Stacy’s concepts – an extended story.
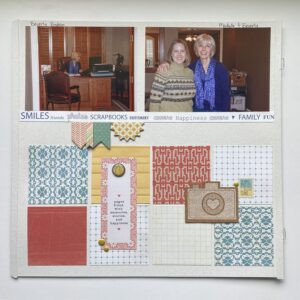
Once I had the idea to combine the two, the rest came together easily. I had already done a double page layout about scrapbooking in general and my friends that share this hobby, so I used that as my 12 x 12 base.
Here are those pages:
I wanted to include journaling documenting what prompted me to start scrapbooking. Of course, I had to talk about my friend, Janelle, who introduced me to Creative Memories and all the fun supplies.
Here is “My Why” page:

You can also find more about my personal “why” in this blog post from July 12, 2022.
All that was left was to find pictures to represent each bullet point. In true creative style, I couldn’t just add pictures, though, I had to have a little fun with the title cards.
I used stencils to create a blended background and then used my Minc to foil the words to create a monochromatic color scheme.
In this picture, hopefully you can see the shine of the foil:
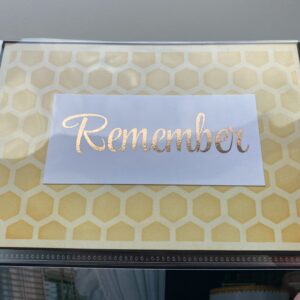
Here are the rest of the pages:
Now I feel that my Scrapbooking Purpose Statement truly reflects why this hobby is so important to me. As long as we are making memories, I will keep scrapbooking them!
As for my Enough Quotient, I have trouble following through with scheduling scrapbooking time. I tend to grab a few minutes here & there during the week and then try to have 2 to 3 hours sometime on the weekend.
This seems to work well for me and when I have a deadline for a project, I will carve out the time I need.
Be sure to leave a comment and let me know what hobbies you enjoy & why they are important in your life.
If you have ever done a Purpose Statement, please share that as well.
Thanks for stopping by!
Machelle
Counterfeit Kit Challenge #1
Welcome back! It’s time for the Counterfeit Kit Challenge #1 for November. The theme for this challenge was “Life Right Now” using the Pinkfresh Studio embellishment pack from the inspiration kit.
Be sure to visit their blog (link above) for lots of ideas and approaches for how to make a kit from your stash & then play along with their challenges to see how everyone uses their supplies.
There are so many ways to interpret this challenge – you could do a “currently” page about what you are reading or watching, current projects you are working on or what your hobbies look like right now.
Then there is the literal what is happening in your life, maybe at work, school or church. A group you are part of, like a book club or exercise class. Maybe you are somewhere that Fall is in full swing and you could do a page about the changing of the seasons.
You could also interpret that as a season of life you are in, such as a new parent or empty nester.
I decided to do a two-page layout documenting our “Life Right Now” fostering a puppy. It has been quite a while since we’ve had a puppy and we couldn’t have asked for a better foster.

We are volunteers with a great rescue group called Texas Husky Rescue. Their motto is #savemorehuskies. We do some behind the scenes work for them but haven’t fostered since we “failed” with our dog Haley.
A few weeks ago; however, a plea came in for 5 puppies that the rescue couldn’t take unless they had dedicated fosters. So we ended up transporting 3 puppies for a 2 hour car ride! That was an experience for sure.
Two of the puppies went to other foster homes & we kept one. All of them were very laid back for puppies and especially husky puppies. We didn’t have him long though. After just about a month, he found his forever home.

I was very excited to dig into my kit “Everyday” for the counterfeit kit challenge #1 & use some of the papers and die cuts. I was able to use two 12×12 patterned papers for the background and a couple of the cardstock pieces for the layers and triangles.
I also used lots of cute puppy pics in various sizes. I like using a few square photos mixed in with the regular 4×6 size.
I did pull some pet embellishments from my stash that were not part of the original kit; however, I also used several of the circle die cut pieces and both of the little notebook journal cards.

I also used the “This is the Life” 4×4 card that I have had for YEARS from an old Simple Stories collection.
I am really pleased with how this layout came out & am looking forward to using up some more of this kit soon.
If you participate in the Counterfeit Kit Challenge #1, be sure to leave a comment or a picture of what your “Life Right Now” looks like.
Be sure to check back in soon!
Machelle #1
November 2022 Counterfeit Kit
Hey there! I am excited to be the Guest Designer once again for the November 2022 Counterfeit Kit Challenge. I always enjoy playing along with their challenge to use your stash.
This month the kit was picked by Lisa Hausmann & this is what she had to say about the inspiration kit:
“I wanted to find a different kit – something that can take us in different direction depending on where we are and how we feel about this time of year – you know that this is my FAVOURITE time of year and I think it has the right hint of autumn for me!”
Here is the kit that Lisa chose:
Scrapbook Werkstatt – October 2022 – Herbstzauber


It is a bright, colorful kit with cut apart sheets, lots of die cuts and gold letter stickers. It also has a cozy feel with sentiments about self-care, road trips & life right now.
Color is always the first thing that catches my eye, so I pulled some colors from one of the cut apart sheets & then added in a LOT of die cuts, some stickers, enamel dots and flowers. I even had a sheet of gold letter stickers.
So here is my version of the kit:
November 2022 Counterfeit Kit: “Everyday”
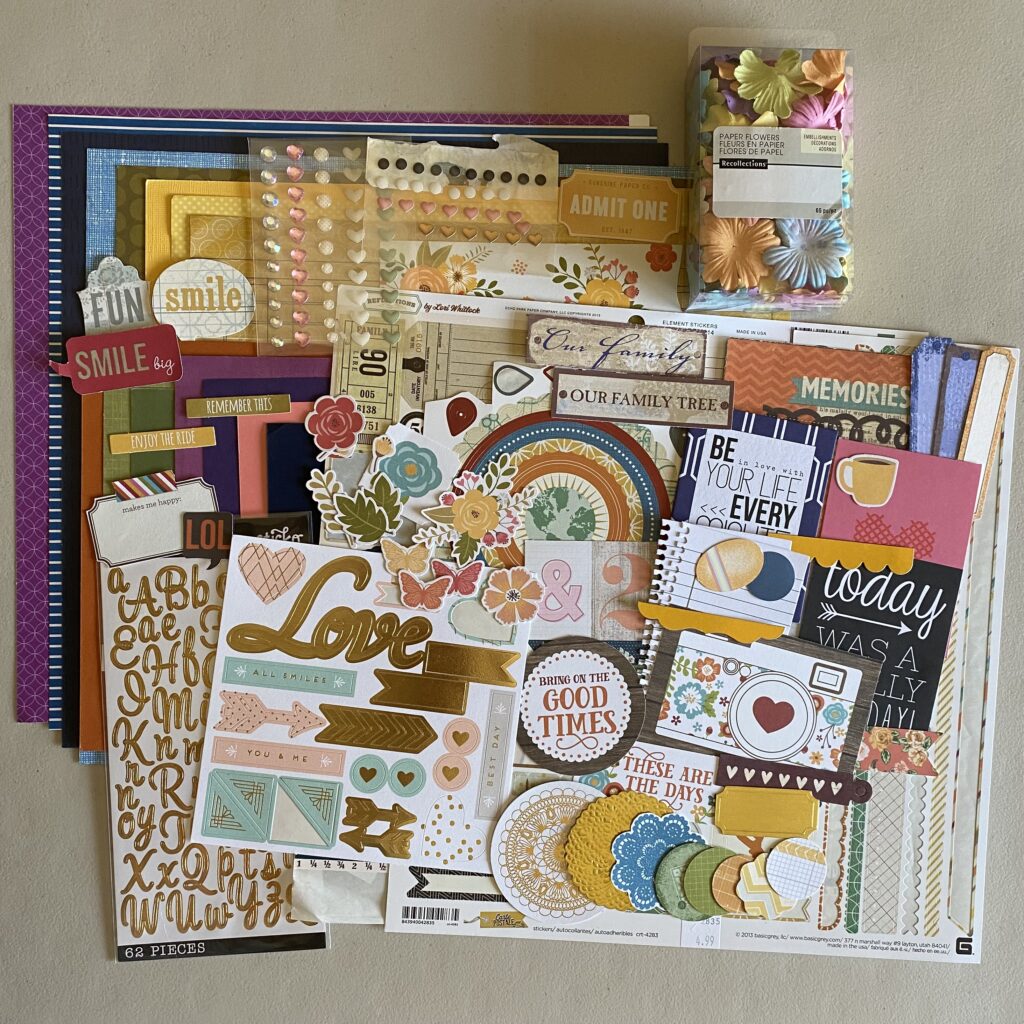
Now lets break it down a little so you can really see the details.
For the papers, I tried to pull some of the colors but also the patterns. There was a lot of variety in the inspiration kit. There are some circles, stripes and a ledger print. I have added some solid scraps and a flower cut apart as well.

Next are the stickers. I had a couple of partially used sticker sheets with labels, tags and coupons. There are sentiments for family, travel and life in general. Also included are the gold letter stickers.

Now let’s look at some of the die cuts. I admit I went a little overboard here, but I have SO many of these type embellishments in my stash. There were quite a few in the inspiration kit, too.

There are some 3×4 cards, fun sentiments, circles, gold accents and even a couple of little notebook paper journaling cards.
And, last but not least, we have a few more die cuts, paper flowers & enamel dots.

I hope that this inspires you to make a kit of your own and gives you ideas about different starting points. It can be color, type of supplies or even just the general feeling of the kit.
You can leave a comment or send me a message if you have any questions. Be sure to visit the rest of the designers to see out how they interpreted this month’s inspiration.
- Counterfeit Kit Challenge – http://counterfeitkitchallenge.blogspot.com/
- Guest Designer – Machelle Willing (that’s me!) – https://www.smalltownscrap.com/blog/
- Cindy – https://cindyscreations-cinmfoster.blogspot.com
- Julene – http://julenebydesign.blogspot.com
- Laura – https://www.instagram.com/mrsp_scrapsandtea/
- Leslie – http://lcsmithsaved-outofthemire.blogspot.com
- Lisa – http://lisahausmann.blogspot.com
- Tara – https://kryptonite72-rambles.blogspot.com
- Tina – http://tinasscrapcorner.blogspot.com
- Anna – https://youtube.com/c/piececraftlove
Come back soon for some more scrappy news!
Machelle
One Little Word for 2022
How many of you have heard of One Little Word or choosing a word for the year to live with, ponder or make a project around? Before I get into my One Little Word for 2022, let’s look at how well I did with last year’s word.
Looking Back

Looking back on my One Little Word for 2021 – Create. I really enjoyed my word last year. I liked that it was an action word as well as that it was so versatile. It could be used in so many different ways. You can read about why I choose that word in this blog post.
I did end up creating a good morning routine, we finished our remodel project and toward the end of the year I felt more creative in my hobbies. I still have work to do on the house as we are still trying to adjust to less space and therefore less storage. But we are making progress.
Looking Forward

Which leads me to my One Little Word for 2022 – Accomplish.
I usually don’t start thinking about my new word until the last half of December. As I started trying to come up with a new word I kept thinking of all the projects (crafty & home) that were still in progress and how much I wanted to finish them. I pondered that one for a few days, looked up the definition and decided I wanted something more versatile. (Create is going to be a hard one to follow!)
So then I thought about complete. So instead of just finishing something, making it feel complete as well as completing the project itself. I liked that one better, but it still didn’t feel quite right.
I finally settled on accomplish because you can accomplish something without actually finishing it. To me, accomplish means making progress or moving forward.
The dictionary definition of Accomplish is: to bring about a result by effort; to succeed in doing something or to succeed in reaching a stage in a progression.
In addition to choosing a word each year, I use a planner that guides me in setting goals for different areas of life. Unfortunately, I am okay at setting these goals but not so good at accomplishing them. Too many days I feel like I am running around in circles and never really accomplishing anything. There are usually so many household “to do’s”, I never get around to the things that I set as my “big” goals. So I definitely need to work on accomplishing at least one small thing that makes progress toward a bigger goal. I hope to do better this year with Accomplish being my focus word.
As well as the projects that I started last year that I would like to see finished, I also have some personal and professional goals I would like to succeed at. I would like to feel like I have accomplished something worthwhile at the end of the day and made some type of progress toward those goals.
One Little Word Project
You can definitely choose a word to ponder on without actually doing a specific project; however, if you are interested in having a prompt each month or prefer to follow along with a classroom community you can go to Ali Edwards website and sign up for her One Little Word Workshop.
I would love to hear from you! Do you make resolutions, set goals or choose a word for the year? Leave me a comment and let me know.
Thank you for stopping by, be sure to check in again soon!
Machelle
Digital Scrapbooking
** This is a sponsored post. Compensation of free digital content was provided by Pixel Scrapper; however, please know I only recommend products or companies that I personally use and love. You may read my full disclosure here. **
Memory Keeping through Digital Scrapbooking
One of the things I love about memory keeping is that there are so many ways to document the pictures and stories of our lives. While I love traditional scrapbooking, I have also found that digital scrapbooking has a lot of advantages.
- With digital, once you buy a kit or element you can use it as many times as you would like and it will never run out.
- You can make a quick project without pulling out all of your physical supplies.
- You can make a “messy” layout without actually making a mess.
- Use as many layers as you want without adding bulk to your pages or albums.
- Print your pages individually or make a photobook.
- Start with templates and just add photos or make a page completely from scratch.
I have dabbled in digital scrapbooking for years and enjoy the process as it is very different from starting with paper supplies. Here are a couple of examples of pages I have made for my scrapbooks:


I have just recently realized all of the other projects digital supplies allow you to do as well. Now I use my software program & supplies constantly for graphics for this website and my social media pages. If you are like me & have trouble with Photoshop, there are several user friendly options for digital software specific to scrapbooking. The one I use is FOREVER Artisan.
In addition to the software, you will need supplies to work with. Just like with traditional scrapbooking, there are unlimited options for papers & embellishments; ribbons, flowers & buttons. The list is endless. One of the best places I have found to get these supplies is a website called Pixel Scrapper. They have several designers and SO many digital scrapbooking kits to choose from. The best part is you can sign up for a monthly subscription and get unlimited downloads per month or you can get a free account and still be able to download up to 5 single elements per day.
Pixel Scrapper also has a wonderful community board with chats, challenges and freebies. There is a gallery filled with inspiration as well as a section full of tutorials on how to use the supplies or even make your own.
If you have any questions, please let me know in the comments or send me an email on the Contact Us page. I would love to know what you think if you go check them out & if you are a digital scrapper post a project in the comments below.
Thank you for stopping by!
Machelle
FOREVER Photo Gifts – Coffee Mug
**This post contains affiliate links. If you make a purchase from clicking these links, I will make a small commission. Please know I only recommend products or companies that I personally use and love. You may read my full disclosure here.**
I think I may be the only one holding out this year until after Thanksgiving to even start thinking about Christmas. It seems like everyone has their trees up & lights on the house already. Well, we are working on the tree & I will post pictures soon, but in the meantime I have been working on a gift for my mother-in-law.
I wanted to make a short video to show you how easy it is to make FOREVER photo gifts. Today I’m going to be making a coffee mug. Choosing the pictures you want to use is definitely the hardest part! Click on the video and if you have any questions, please let me know!
FOREVER photo gifts are just the beginning. You can also make digital photo albums, calendars, ornaments or notebooks. Of course, they are known for their online storage with a lifetime guarantee. I would love to help you organize, save and share your photos in a way that works for you. To get your free account and $20 Welcome coupon, you can sign up through my Small Town Scrap Refer a Friend link.

Let me know if you would like a one on one consultation & please be sure to leave me a comment or send an email and let me know if this was helpful.
Until next time,
Machelle


